Converting Home Made DVD’s


It was only a few years ago that home movies would be regularly burned to DVD’s and most of us have some DVD’s that we have collected over the years in this way.
Now that many of us have Apple TV’s or indeed other devices that make it much more convenient to store these home movies on our computer hard drives, we are faced with the process of converting them so they can be used in this way. Below I have outlined how I do this and why I do it the way that I do.
Some us may have VHS/DVD recorders, and are able to transfer our old VHS home movies to DVD’s so they can be converted in the same way without additional equipment.
I use an application called MPEG Streamclip to do my conversions. There is other software available but I find this application has a comparatively easy interface and produces much higher quality video than other software available.
What you will need:
-
 The latest version of MPEG Streamclip. You can get this here: http://www.squared5.com, it’s a free application.
 -
Quicktime Player. You can get this here: http://www.apple.com/quicktime/download, Quicktime player is free, you do not need the Pro upgrade for this process. Snow Leopard users should be aware they will need Quicktime 7 or better, Quicktime X that comes with Snow Leopard will not do this.
-
The mpeg2 playback component and license for Quicktime. You can get this from here: http://www.apple.com/quicktime/mpeg2, this component will cost you $ 19.99.
Once you have everything downloaded and installed you can begin the simple process of conversion. I don’t intend working through many of the settings available to you, you will need to consider whether your DVD is Widescreen or standard 4:3 and whether you are located in a country that uses the PAL standard or the NTSC standard. The DVD I will be working on is a PAL Widescreen movie.
This process is carried out on a mac, windows users may need to follow slightly different procedures.
Place your DVD into your optical drive and navigate to its contents in the finder. Also open MPEG Streamclip.
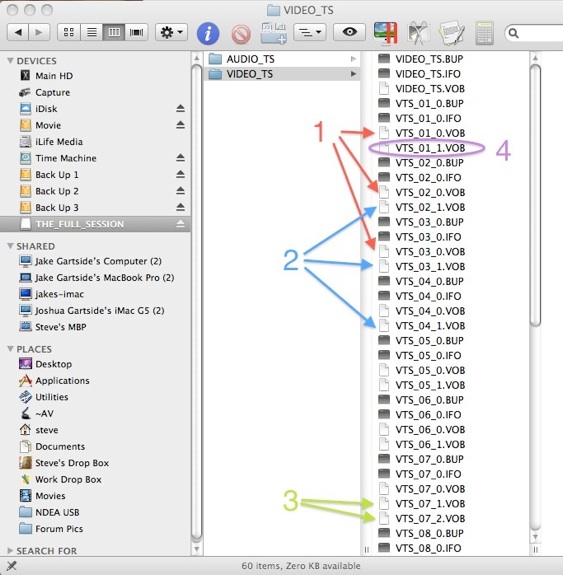
Open the VIDEO_TS folder to reveal its contents. My DVD had several short videos on it, DVD’s with fewer videos will have fewer files than shown here.
We can ignore all contents that are not of the form VTS_**_*.VOB
-
1.We can further ignore any file of the form VTS_**_0.VOB
-
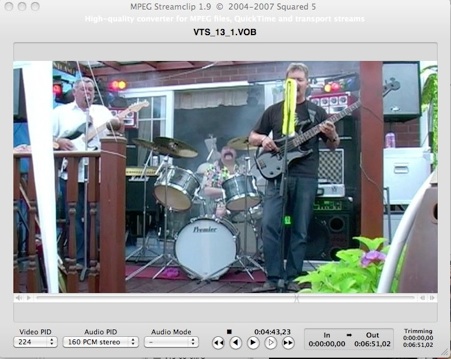
2.If we drag and drop any VTS_**_1.VOB file into the MPEG Streamclip window the video associated with that file will open. (Note some video streams will be DVD menus, you will see which these are as you add them to the MPEG Streamclip window)
-
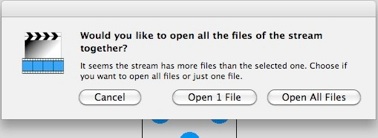
3.Longer video streams will have more than one ‘VOB’ file (ignoring the ****0.VOB file), we can drop any of these files into MPEG Streamclip and we will be asked if we wish to join them together, we should choose to do so by selecting ‘Open All Files’. (Note only the files for this particular stream will be joined together)
-
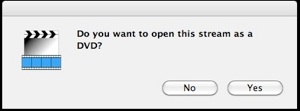
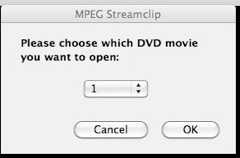
4.By selecting the VTS_01_1.VOB, MPEG Streamclip will ask you if you want to open the stream as a DVD, selecting yes will allow you to choose to load any of the streams on the DVD.
Having opened the stream (or video) of our choice we can now get to work on converting it. The first thing we need to do is decide whether we are converting for end use or for editing purposes. Since I had edited most of my old movies before adding them to a DVD, I’ll deal with conversion for end use first. In this case my end use will be on my Apple TV.
From the MPEG Streamclip file menu, we choose ‘Export to MPEG-4’, the resulting window incorporates an itunes button which will reveal an Apple TV preset if you wish to use it. Personally I find these settings to be a quick conversion of similar comparison to other software I could have used, being my home video I’m looking for best quality at small file sizes, so I use my own settings which you can see below.
Conversion will take considerably longer using these settings, you may also want to experiment with settings like the Data Rate yourself.
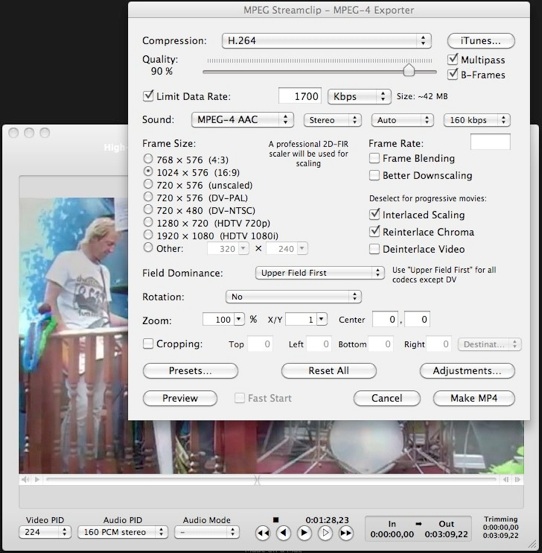
Finally, all that’s left to do is select ‘Make MP4’, choose a name and destination, wait a while and then you’re done.
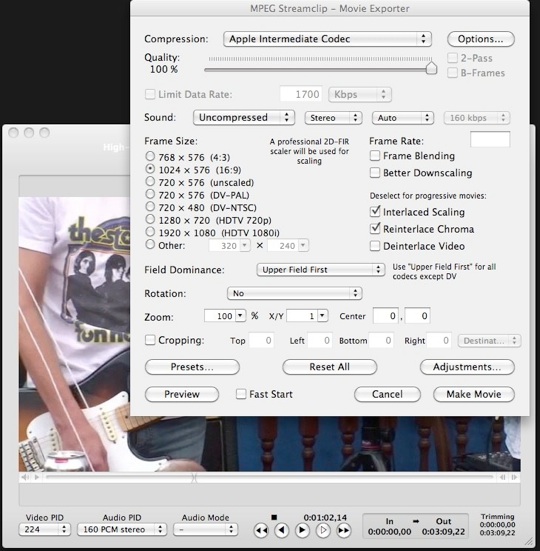
Now if you were thinking of editing the content of your DVD, you would select ‘Export To Quicktime’ from the MPEG Streamclip file menu and make the following selections. (Assuming you will be editing in iMovie or Final Cut)


SITE DESIGNED AND MAINTAINED BY ZAKOTTE STUDIOS